Ever tried something new and instantly realized it’s way trickier than it looks in photos? That’s exactly what happened to CMDR_WHITESNAKE when they decided to combine their software skills with some hands-on hardware by picking up an ESP32 C2 board. The goal? To try their first attempt at soldering—and learn a whole lot along the way.
First Impressions of Soldering the ESP32 C2
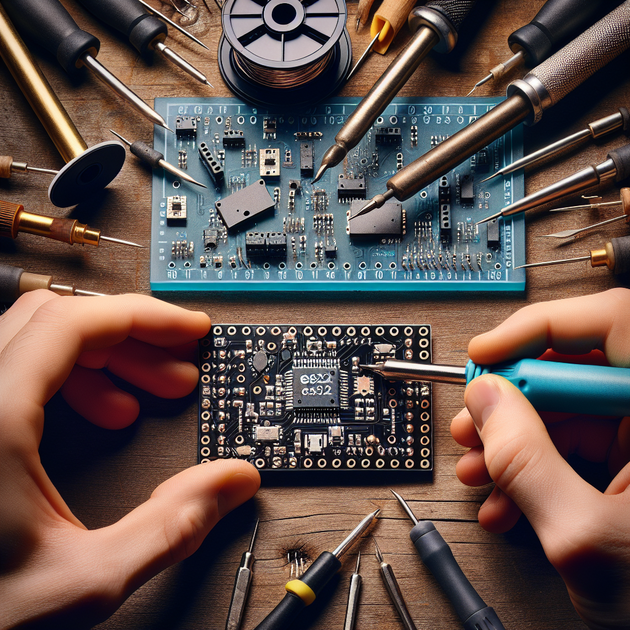
Soldering can look easy in YouTube tutorials, but as soon as you sit down with that tiny board in front of you, things get real—fast. The ESP32 C2 isn’t just small; it’s practically microscopic in the world of microcontrollers. That means every move counts, every dab of solder needs precision, and you’ll probably discover (as many do) that your hands shake more than you thought!
For CMDR_WHITESNAKE, the journey started with excitement and quickly switched to a bit of nervous laughter when they saw just how tiny those pins were. Watching video after video helped set expectations but can’t replace real-world practice.
What Went Well (and What Could Be Better)
Let’s break down what worked for this first attempt at soldering—and where there’s room to grow:
- Swapping Solder Gauge: Realizing the initial wire was too thick for such small pads was a game changer. Switching to a thinner gauge made it easier to control the amount of solder and avoid accidental bridges.
- Sequential Approach: Tackling one row (the bottom) before moving onto the top helped keep things organized and let learning happen step by step.
- Learning by Doing: No matter how many tutorials you watch, nothing beats actually holding the iron yourself.
- Solder Flow Control: It sounds simple, but figuring out just how much heat and time is needed to get smooth joints without overheating takes practice.
Of course, every first attempt comes with its share of “oops” moments—maybe a pin or two got too much solder or there was a minor bridge that needed cleanup. That’s all part of the process.
Beginner Soldering Tips for Small Boards
If you’re inspired to give this a go after reading about this first attempt at soldering (or if you’re looking to improve your own technique), here are some practical tips:
- Use Thin Solder: For boards like the ESP32 C2 with closely spaced pins, 0.4mm or even thinner is ideal.
- Tweezer Magic: Invest in a fine pair of tweezers; they help keep components steady without blocking your view.
- Tinned Iron Tip: Always keep your iron tip clean and freshly tinned—this prevents oxidation and helps transfer heat evenly.
- No Rushing: Take your time! Speed leads to mistakes like cold joints or accidental bridging.
- Check Work Under Magnification: A cheap magnifying glass can help spot issues before powering up.
- Solder Flux Pen: Flux isn’t just for pros—it helps prevent bridges and lets your joints shine!
Anecdote: The “Aha!” Moment
There’s always that one moment when things start clicking into place—for CMDR_WHITESNAKE, it was right after switching to a thinner gauge of solder on the top row. Suddenly, those dauntingly tiny pads seemed less intimidating. The joints looked smoother and neater compared to the bottom row—a visible sign that little adjustments can make a huge difference.
It’s these small victories that keep people coming back to DIY electronics projects. Each mistake becomes a lesson; each improvement feels like leveling up in real life.
Your Turn: How Would You Rate This First Solder Job?
Reading about someone else’s journey can be reassuring—everyone starts somewhere! CMDR_WHITESNAKE came away from their first attempt at soldering with more confidence (and maybe a touch more humility). If you’ve been thinking about starting out with hardware projects like this or have tackled similar challenges yourself, what advice would you offer?
Have you found any tricks that make working with tiny boards easier? Would you have done anything differently on this ESP32 C2 project?
Share your stories or feedback—after all, every great maker started as a beginner willing to try something new.
Leave a Reply