If you’ve been flying a starter quad like the Aquila 16 and want sharper video or longer range, this FPV drone upgrade roadmap gets you moving today. In the next hour, you can shortlist compatible radios and headsets, order parts with confidence, and understand exactly what plugs into what—no solder smoke required.
Why Upgrading Matters
The first months of FPV flight are pure adrenaline—until the limits show up. The built‑in camera looks grainy under trees; signal dropouts cut your range short. That’s when most pilots realize that pre‑built kits trade simplicity for flexibility. What changed lately is accessibility: mid‑range gear now costs less than your first ready‑to‑fly kit did a year ago. Radios like the Radiomaster Boxer or goggles such as DJI Goggles 2 can pair with almost any open‑protocol receiver in minutes.
Instead of scrapping your old drone, think modularly. Your frame and motors still have life; swapping the radio link or video system brings the biggest jump in quality per dollar.
How an FPV Drone Upgrade Works
You’ll do two main things—replace your control link (radio) and improve your video feed (goggles or VTX). Here’s a quick walkthrough:
- Step 1: Check your flight controller’s receiver port label (often “RX” or “SBUS”). Note if it uses UART or SPI protocol.
- Step 2: Pick a radio that supports that protocol. For example, if it’s ExpressLRS UART, grab a Radiomaster TX16S with built‑in ELRS module.
- Step 3: Bind radio to receiver: power both on → hold receiver bind button → in radio menu tap “Model Setup > Internal RF > Bind.” Wait for solid LED.
- Step 4: For video clarity, choose a digital system such as DJI O3 or Walksnail Avatar. Mount the VTX (video transmitter) where your old analog board sat; plug in the camera ribbon cable and 5 V lead.
- Step 5: Pair goggles by selecting “Device > Link” in their menu while pressing the VTX link button until LEDs flash green.
Run a quick sanity check before lift‑off: power on props removed; confirm stick inputs move channels in Betaflight Configurator’s “Receiver” tab. If throttle twitches when you yaw—your channel map is wrong. Reassign AETR1234 order until motion matches sticks.
A Story from the Field
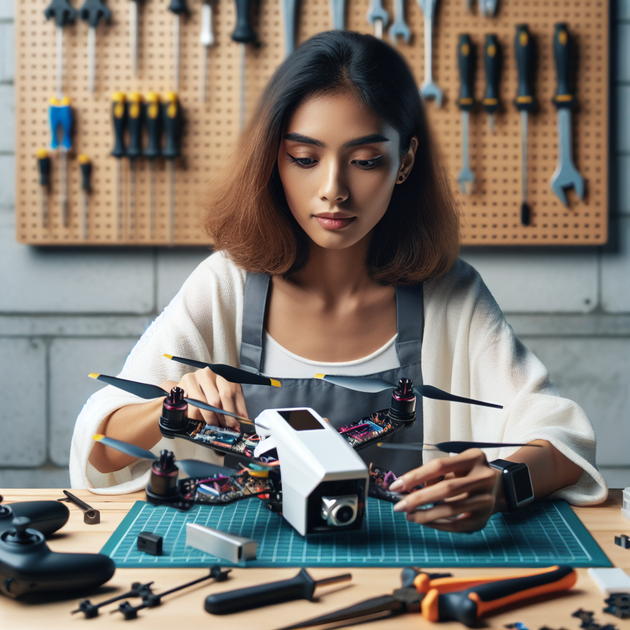
I met Jules at an empty soccer field outside Lyon—a pilot who’d flown an Aquila kit for nine months and thought his shaky footage was “just normal.” We swapped his analog camera for a digital DJI O3 Air Unit right there on a folding table. Ten minutes later his feed looked cinematic instead of foggy gray. The kicker? He didn’t touch a soldering iron; everything used JST plugs already on his board.
That moment sold him on incremental upgrades over full rebuilds. It also proved that confidence—not complexity—is usually what keeps beginners from better video.
The Contrarian View: Don’t Chase Specs Blindly
Here’s where some pilots get burned. They buy top‑tier goggles but keep flying with a noisy analog transmitter—then blame lag or range issues on “firmware.” The truth is that matching systems matters more than spec sheets. Digital goggles paired with analog transmitters will always bottleneck image quality. Conversely, analog setups still excel in tight indoor spaces thanks to lower latency and lighter weight.
The trade‑off is cost versus repairability. Digital modules often need proprietary cables and updates via vendor apps like DJI Assistant 2 (official download page). Analog units remain universal—you can swap brands freely—but you’ll sacrifice clarity past 200 m. Decide based on environment first, not features list.
Pitfalls and Fixes
Voltage mismatch: Many beginners fry new VTX boards by connecting them to raw LiPo voltage instead of regulated 5 V/9 V pads. Always verify pad labels on the flight controller diagram before powering up.
Antenna orientation: Keep antennas at 90° apart (one vertical, one horizontal) to maintain polarization diversity; tape them loosely to zip ties rather than metal arms.
Firmware drift: When radio modules refuse to bind even after “success,” check firmware versions—ExpressLRS 3.x won’t always talk to 2.x receivers until both sides are flashed using ELRS Configurator (download here). Update both, then re‑bind.
Quick Wins for Beginner Upgrades
- Add heat‑shrink labels on every plug before disassembly—saves hours later.
- Use Betaflight’s “Receiver” tab screenshot as backup before flashing firmware.
- Tape down loose camera cables with cloth tape; vibration causes rolling lines in video.
- Create a checklist file named Preflight.txt: battery voltage ≥14 V, goggles linked green LED solid, props tight clockwise/counterclockwise verified.
- If signal drops midair, set failsafe to “Drop” mode until PID tune stabilizes—prevents flyaways during tests.
The Broader Picture of an FPV Drone Upgrade
An upgrade isn’t only about pixels—it’s about control feel. Radios differ in gimbal tension and latency more than range claims suggest. Trying another pilot’s transmitter is worth more than reading ten specs sheets. You’ll instantly know if smooth throttle curves make tighter turns easier to judge by ear instead of sight.
This tactile element explains why many veterans keep older FrSky X9D radios even while switching to digital video—they trust muscle memory over fancy screens. So before spending big, borrow gear at a local club or maker space; you might find comfort beats clarity when precision counts.
Troubleshooting After the Swap
If motors stutter post‑upgrade, confirm protocol settings inside Betaflight’s “Ports” tab match hardware wiring—UART1 for serial RX usually works best. Then recalibrate ESCs via BLHeli Configurator (“Read Setup > Calibrate”). Watch current draw; if total amps exceed earlier logs by 20%+, props may be off balance from reinstallation.
Video freezing every few seconds? Check SD card speed class inside goggles; anything below U3 causes recording hiccups even if live feed seems fine. Also ensure antennas aren’t pressed against carbon fiber—it detunes signal paths silently until range halves without warning.
A Small but Useful Habit
Keep one USB data cable permanently taped near your LiPo charger station. Why? Because firmware bugs never wait for weekends—you’ll want instant access when something refuses to arm at midnight before a meet‑up flight. Saving two minutes hunting cables can mean catching daylight instead of debugging indoors.
A Final Thought
You don’t need to rebuild from scratch to feel that first smooth dive again. Upgrading one component at a time teaches wiring logic gradually—and every success boosts confidence for the next tweak. So which part would change your flights most today: clearer vision or steadier control?
Leave a Reply