Ever wondered if you could save an old camera lens with just a couple of plastic parts? That’s exactly what happened when I found a rare but broken 70 year old lens online—and brought it back to life using only two simple 3D prints.
The Story Behind This Vintage Find
I was scrolling through listings looking for something unique for my Pentacon Six system when I came across this intriguing offer. The seller had listed a rare vintage lens as “for parts” and the price was just €25—hard to say no to that! When it arrived in the mail, the outside looked pretty good for its age (after all, this is a 70 year old lens). But then I noticed there was also a little bag of loose bits packed in with it. Turns out most of the hardware was there… but the entire aperture mechanism had been removed.
Diagnosing the Problem—and My Plan of Attack
At first glance, it seemed hopeless. Anyone who’s tried to source original replacement parts for obscure Soviet-era lenses knows what an impossible quest that can be. But then inspiration struck—why not design and print my own replacements? After all, basic geometry is something even entry-level FDM printers handle well these days.
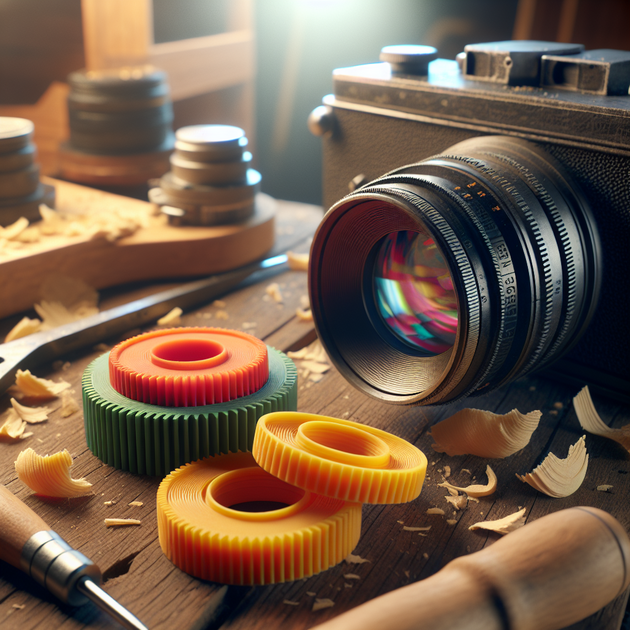
- Identifying Missing Pieces: Most of the mechanism was intact except for two key internal parts linked to aperture control.
- Designing Replacements: Modeled both missing components in simple CAD software using measurement calipers and patience.
- Printing Quickly: Used basic PLA filament—honestly didn’t even bother to swap out my printer’s color from last time.
- No Light Leaks: Both pieces fit deep inside where no light hits them anyway (so that odd color doesn’t matter).
- Final Assembly: Fitted everything back together by hand and tested movement—it worked!
The Fix: What Worked (And What Didn’t)
I have to admit—my fix wasn’t perfect. The fully automatic aperture mechanism had been completely removed and those tiny interlocking arms were far too complicated to remake on my home printer. Instead, I went for the next best thing: directly connecting the aperture blades to the aperture ring itself. It’s manual-only now, but at least it works!
The printed parts aren’t black like factory originals—they’re blue because that’s what was loaded in my printer at the time. In theory, black would be better in any optical path due to stray reflections…but since these bits sit deep inside where light never reaches them anyway, I figured why waste time swapping filament?
A Small Win and What I Learned
This whole project reminded me just how resilient old gear can be—and how much fun there is in figuring things out yourself. Even though my 70 year old lens isn’t quite as automatic as when it left the factory decades ago, it now mounts on my Pentacon Six and takes photos like nothing ever happened.
Anecdote:
The first test shot after reassembly was honestly nerve-wracking! There’s always that moment before you hit the shutter where you wonder if all your makeshift fixes will hold up or if something will snap inside… But hearing that satisfying click (and seeing a well-exposed frame) was totally worth those hours hunched over Tinkercad and my printer.
- If you find an old lens missing small mechanical bits—don’t assume it’s lost forever.
- Even basic home printers are good enough for many “non-optical path” replacement parts.
- No one will see your bright blue internals (unless you want them to!).
- You don’t have to restore every feature—sometimes “good enough” really is enough to get shooting again.
Your Turn: Would You Try Fixing Old Lenses?
I love bringing forgotten hardware back into use—even if it means hacking together solutions with whatever tools are at hand. If you stumbled across a busted piece of classic gear like this 70 year old lens, would you try giving it new life? Or do you think some things are better left as shelf queens? Share your thoughts or your own fixes below!
Leave a Reply