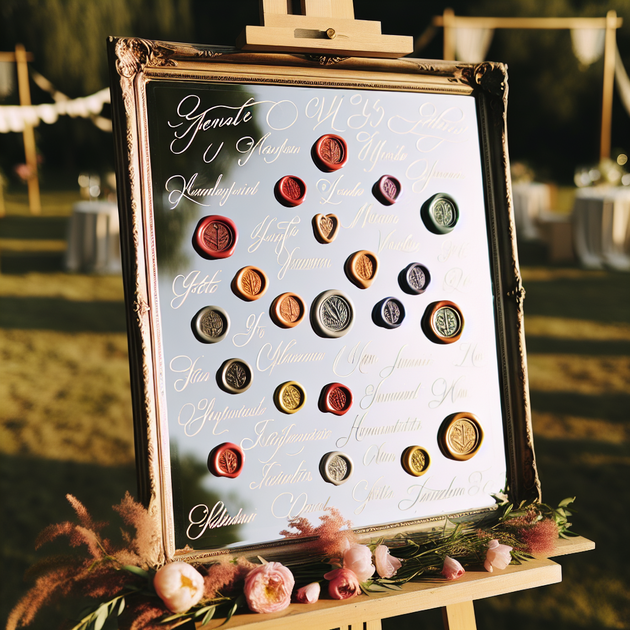
Our Seating Chart Is Finally Done and I’m Beyond Happy
What if you could create a beautiful wedding seating chart for less than the cost of dinner out? That’s exactly what happened when I finished my own DIY mirror seating chart—and honestly, it turned out even better than I hoped.
Turning a Thrift Store Find Into Something Special
The heart of this project was a vintage-style mirror I found at a local thrift shop for just $20. You really never know what you’ll stumble on in those stores! The frame had just the right amount of character—nothing too flashy but definitely not plain either.
I hauled it home (carefully), wiped off months of dust, and started picturing how it could be transformed into our perfect wedding seating chart. There’s something extra satisfying about giving new life to an old find instead of buying something mass-produced.
Creating the Look With My Cricut and Wax Seals
Once the mirror was ready, it was time to make it personal. I used my trusty Cricut machine to cut each guest name and table number out of white vinyl. If you’ve ever wondered whether those machines are worth it—honestly, they’re game changers for projects like this!
Here’s exactly what went into making this DIY mirror seating chart:
- Thrifted vintage mirror ($20)
- Cricut machine with white vinyl
- Handmade wax seals (made in batches at home)
- Glass cleaner & microfiber cloth (for all those fingerprints!)
Sticking each name on the glass took some patience (and steady hands), but seeing the design come together was so rewarding. For an extra touch of elegance, I made wax seals in our wedding colors and added them next to each table section. Making those seals was actually pretty relaxing—it felt almost meditative after a long day.
The Ups and Downs of Going DIY
Of course, not everything went smoothly. By the time I finished placing all the names on the glass—plus adding those wax seals—I realized my fingerprints were everywhere! Thankfully, that’s nothing a quick wipe-down can’t fix.
A little anecdote: halfway through arranging everything on the mirror, our cat decided she needed to “help” by batting at stray bits of vinyl on the floor. So if you ever want some feline supervision during your crafting sessions… leave your supplies unattended for five minutes!
But honestly? The small hiccups just make me love this project more. It’s got personality—and memories—baked right in.
Why Make Your Own Wedding Seating Chart?
There are plenty of reasons to try your hand at making your own seating chart:
- It’s way cheaper than most custom options (mine cost under $25 total)
- You get complete creative control over colors and style
- You can reuse or repurpose materials after the big day
- It makes for an awesome keepsake or home decor later on
- The process itself is fun (and super satisfying to finish!)
If you’re thinking about tackling your own project—go for it! Having something handmade at your celebration feels really special.
The Finished Result—and What’s Next?
Now that our seating chart is done and ready to go (minus some last-minute fingerprint cleaning), I honestly couldn’t be happier with how it turned out. Friends who’ve seen it say it looks like something from a boutique wedding shop—not bad for less than $25!
If you’re planning your own wedding or just want to try some new crafts with your Cricut machine, don’t underestimate what you can pull off with a little imagination (and maybe some patience). What would you use as the base for your own unique seating chart?

Leave a Reply